[ image via a pair and a spare ]
Showing posts with label DIY. Show all posts
2.15.2012
DIY: Ombré Dip Dye Shirt
I immediately fell in love when I saw this tutorial on a pair and a spare (an amazing site for fashion DIYs!) -- not only is the result awesome, but the process is simple enough for an uncrafty person such as myself. I am definitely going to do this when I am home in March and rekindle my tie-dye roots (my friend Jill and I used to sell tie-dye tanks throughout high school and called our "company" To Dye For... totally original, I know...). Check out the post to see the instructions and make an ombre tee for yourself!
9.07.2011
DIY + FYI: Depotting MAC Eye Shadows + Back to MAC
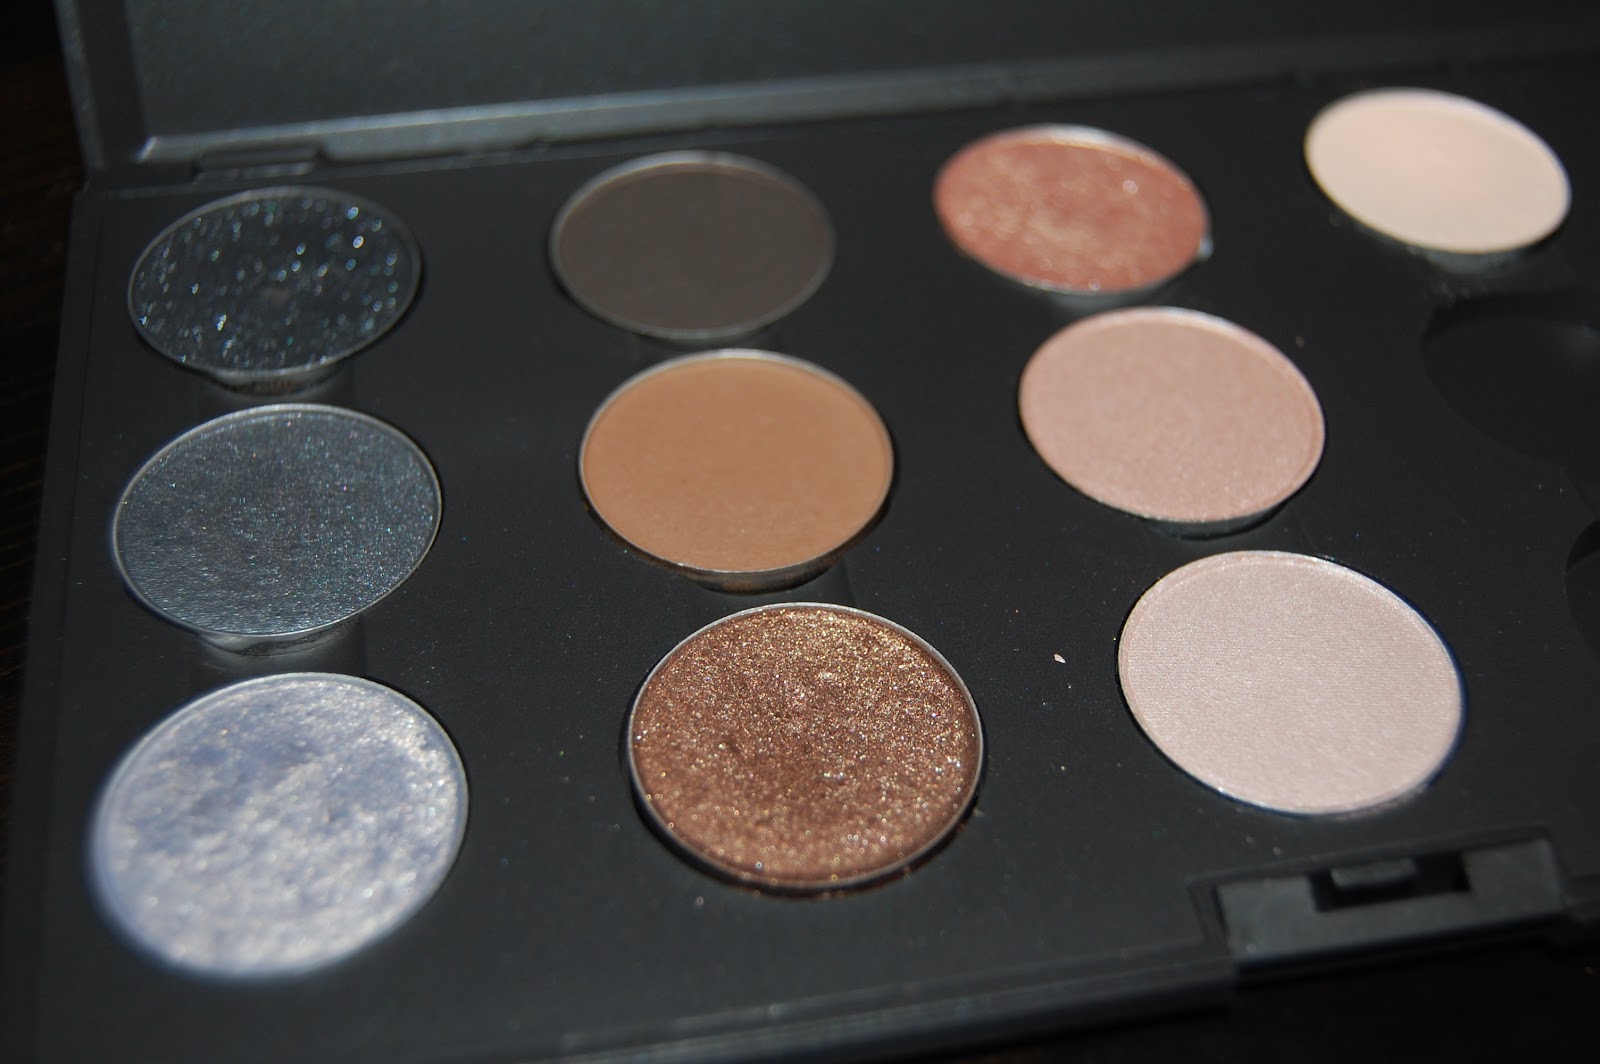
I got inspired to depot my large collection of singular MAC eye shadows and put them into a palette when I heard about the Back to MAC program. I'll do anything for free stuff. After all, I'm an aspiring extreme couponer, remember?! Basically, if you return 6 glass or plastic containers empty of their original MAC products, you can receive either a free lipglass, lipstick, or eye shadow (if returned to a MAC pro store, you have all three to choose from... but if returned to a make up counter within a dept. store, you have less options).
Once I depotted all of my shadows on Sunday, I went to the local MAC store and traded in 12 empty eyeshadow containers, purchased a palette, and got 2 eye shadows ("Phloof!" and "Naked Lunch") for free! Then on Monday, I went back with 6 more empty containers, got "Smut" for free, and bought another palette to house the overflowing collection. Check out my pictures below to see what I did and how you could depot your MAC shadows too:
Getting started on Day 1 of Mission: Free Eyeshadow
Tools You Need:
- palette
- magnetic tape
- scissors
- something sharp, like a knife
- a flame
- tweezers
- magnetic tape
First Thing:
Pry the plastic that encases the eyeshadow out of the container with your knife.
Be careful! Just stick it in the crevasse and wiggle it, it will pop out easily.
Step Two:
You need to use the tweezers to hold the plastic over the flame.
The plastic has to melt a little and bubble enough that you can press your knife through it.
(to pop the eyeshadow pan out of the plastic casing)
Just a little bit longer.......
Step Four:
Using the knife, or your scissors, press the melty plastic until you pop the eyeshadow pan out.
Leave the pan upside down, because you will want to place the label on the back.
Step Five:
Hold the original plastic container over the flame at an angle to loosen the glue on the label.
Once you see a little bubbling of air under the label, use the tweezers to get in the crack and peel it off.
Step Six:
Using your tweezers, peel the label off of the plastic and place it on the pan
Because this shadow was a free Back to MAC shadow, the lady wrote on the label. Booo!
Step Seven:
Cut a little bit of the magnetic tape to place on the bottom of the pan.
Don't cover up the name though!
Hmm... where to put it in the palette.....
Top Row (from left to right): Mystical Mist, Freshwater, Green Smoke
Middle Row: Parfait Amour, Steamy, Swimming
Bottom Row: Cremé de Violet, Aquadasiac
Top Row: Black Tied, Smut, Honey Lust, Vapour
Middle Row: Knight Divine, Cork, Naked Lunch
Bottom Row: Idol Eyes, Tempting, Phloof!
Tools You Need:
- palette
- magnetic tape
- scissors
- something sharp, like a knife
- a flame
- tweezers
- magnetic tape
First Thing:
Pry the plastic that encases the eyeshadow out of the container with your knife.
Be careful! Just stick it in the crevasse and wiggle it, it will pop out easily.
Step Two:
You need to use the tweezers to hold the plastic over the flame.
The plastic has to melt a little and bubble enough that you can press your knife through it.
(to pop the eyeshadow pan out of the plastic casing)
Just a little bit longer.......
Step Four:
Using the knife, or your scissors, press the melty plastic until you pop the eyeshadow pan out.
Leave the pan upside down, because you will want to place the label on the back.
Step Five:
Hold the original plastic container over the flame at an angle to loosen the glue on the label.
Once you see a little bubbling of air under the label, use the tweezers to get in the crack and peel it off.
Step Six:
Using your tweezers, peel the label off of the plastic and place it on the pan
Because this shadow was a free Back to MAC shadow, the lady wrote on the label. Booo!
Step Seven:
Cut a little bit of the magnetic tape to place on the bottom of the pan.
Don't cover up the name though!
Hmm... where to put it in the palette.....
I separated the shadows into "colorful" and "neutral" palettes.
Top Row (from left to right): Mystical Mist, Freshwater, Green Smoke
Middle Row: Parfait Amour, Steamy, Swimming
Bottom Row: Cremé de Violet, Aquadasiac
Top Row: Black Tied, Smut, Honey Lust, Vapour
Middle Row: Knight Divine, Cork, Naked Lunch
Bottom Row: Idol Eyes, Tempting, Phloof!
Have you ever done this? Do you think you ever will?
9.04.2011
DIY: Gorgeous Curls... While Sleeping
Everyone and their mother has been swearing by this video's method for curling hair, so I thought I'd share it with you guys since I finally tested it out and loved it! I didn't have to put any product in my hair prior to wrapping it up, just dry hair and a headband, and I had great results! Check out this easy, quick way to ensure you wake up with fun, bouncy curls (and listen to her awesome accent which makes me wish I was in Europe!):
Let me know if it works for you!
8.18.2011
DIY: Fishtail Braid
Emily, of Cupcakes and Cashmere, made a tutorial video on how to do a fishtail braid. Thanks to her I finally know how and plan on trying one soon. I can finally cross of "google how to do a fishtail braid" off my never ending to-do list (which includes such trivial stuff as "find bright neon orange nail polish" and "make a friendship bracelet"... I know, dire stuff.).
5.12.2011
DIY: Necklace Wall
Since we moved, I can never find the necklaces Im looking for -- they are all over the place. Last night I got a rush of inspiration and took my hammer and nails to the wall. What do you think?
Subscribe to:
Posts (Atom)